A recent article on Petapixel on Adobe Lightroom CC (the upgrade from the regular Adobe Lightroom) has my interest piqued. LR now comes with a dehazing tool that reportedly does great stuff to photos that have haze in them. A lesser-known application is the automation of contrast and exposure adjustment to astrophotographs. I decided to revisit one of my older photographs of the Milky Way from Yosemite and try it out. The result is below.
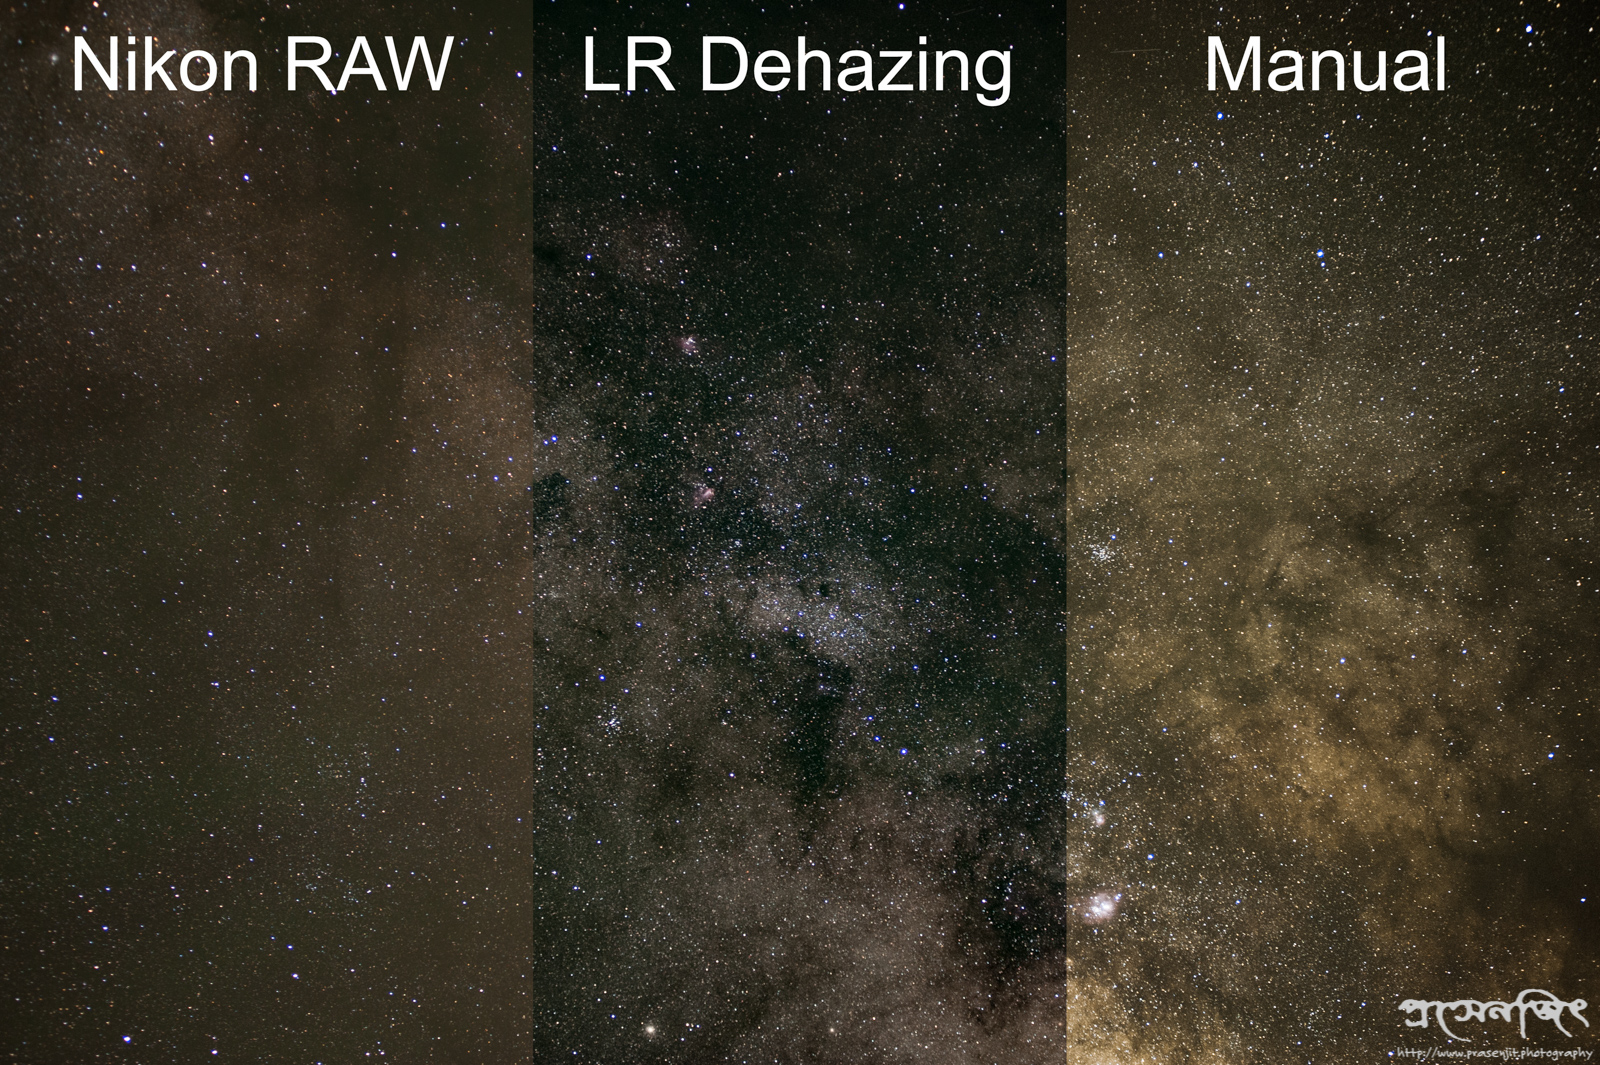
Comparison of SOOC, LR Dehazed, and Manual Adjustment
On the left is the straight-off-the-card raw NEF image (90 seconds at 80mm f/4). This portion of the Milky Way was fairly close to the horizon and there is some lingering skyglow. The second image is the result of post-processing the raw image in LR with dehazing set to maximum, and a saturation reduction in the green channel. The image on the right is the result of post-processing with exposure, contrast, and saturation adjustments. In both the center and right images, I’ve applied some amount of noise reduction.
The verdict: the dehazing tool is definitely very good. There are purists who are complaining (as evidenced by the Petapixel article) about how the dehazing tool simply replicates contrast / exposure / clarity adjustments. I think that they are missing the point – it takes me way more time and effort to get something close to the result of the dehazing tool (center image). And even then, I’m not able to reduce skyglow by a large enough amount (rightmost image).
